How to Centrally Manage HiveMQ Edge With Barbara
The journey towards digital transformation in the Industrial IoT (IIoT) space is paved with challenges, primarily centered around bridging the gap between Operational Technology (OT) and Information Technology (IT). Companies often struggle with managing a distributed fleet of edge devices, ensuring data reliability from legacy industrial assets, and securely deploying and updating software at scale. This is precisely where the combined capabilities of Barbara and HiveMQ Edge create a seamless and powerful solution.
Why Barbara and HiveMQ Edge are Better Together
On one hand, you have Barbara, a robust edge orchestration platform. Its key advantage lies in its ability to centrally manage the lifecycle of your edge infrastructure. This includes deploying applications in containers and machine learning models, managing device configurations, ensuring cybersecurity with a secured OS, and automating updates across thousands of devices. For customers, this means reduced operational complexity, lower maintenance costs, and the ability to scale their edge deployments confidently.
On the other hand, HiveMQ Edge serves as a powerful MQTT gateway, specifically designed to solve the data-level challenges at the edge. Its strength is in translating proprietary industrial protocols (like Modbus, S7 or OPC-UA) into the standardized and lightweight MQTT format. It ensures that data from diverse industrial assets is normalized, reliable, and efficiently transmitted. For businesses, this translates to better data accessibility, improved data quality, and a solid foundation for building data-driven applications.
By using both solutions, you create a synergistic relationship that accelerates your digital transformation:
Barbara provides the "how": how to securely deploy, manage, and update your software on a fleet of distributed devices.
HiveMQ Edge provides the "what": what data to collect, translate, and make available for your enterprise systems.
This blog post will guide you through the practical steps of integrating these two platforms. We will demonstrate how you can leverage Barbara to easily deploy and configure HiveMQ Edge instances, including using the default application image prepared by Barbara for HiveMQ Edge or building a custom image with advanced configurations and attached licenses, all from a single, centralized management panel.
Prerequisites for Deploying HiveMQ Edge on Barbara
Before we begin, make sure you have the following:
A Barbara account
A HiveMQ Edge license file for the production deployment
Case 1: Deploy HiveMQ Edge Using the Image Provided by Barbara
Step 1: Add HiveMQ Edge in Your Apps List on Barbara Panel
First, we are going to deploy the standard HiveMQ from the Barbara Marketplace.
1. Log in to your Barbara account on the Panel.

2. Navigate to the "Apps" section and click the square with dots on the top bar to access the Marketplace.

3. Once in the Marketplace, use the search bar to find “HiveMQ”, and the results should show HiveMQ Edge.

4. Enter into the product description page and click the button to Add it in the library. Once done, you should see it under your Application list if you go back to the “Apps” section.

Step 2: Deploy the Application to Your Node
Now that we have HiveMQ Edge in your application catalogue, we can deploy it on the node.
1. Log in to your Barbara account on the Panel and go to the “Nodes” top bar menu.

2. Select your node and navigate to the "Apps & Models" section.
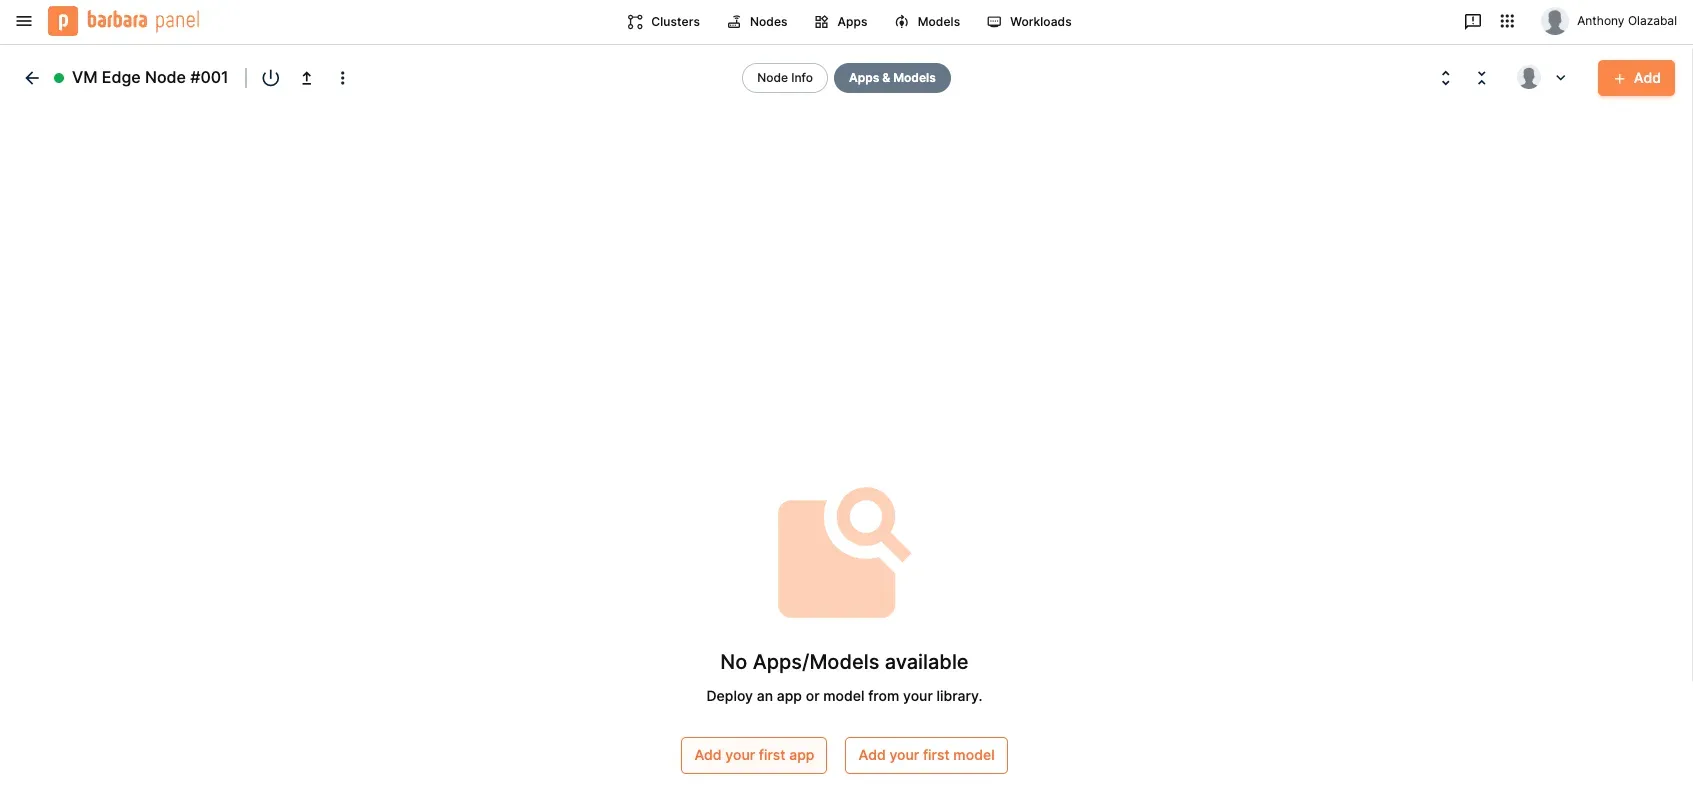
3. Click “Add your first app” (or “Add” if you already have existing applications) and select HiveMQ Edge with the desired version.

4. Click “Next” and configure application secret properties.

5. Click “Next” and configure advanced properties like the MQTT listener port as well as additional listeners.

6. If needed, review and adjust the application configuration.

7. Once ready, click “Send app” to trigger the deployment on the Edge node.
You should then be able to monitor the deployment progress of the application until it is available to use.

With this first method, you can deploy the application using the default image built by HiveMQ and deployed in the marketplace by Barbara. Let’s see how to build a custom application.
Case 2: Deploy HiveMQ Edge Using a Custom Application Build
Step 1: Prepare Your HiveMQ Edge Configuration
First, you need to prepare your Edge configuration. When it comes to deploying HiveMQ Edge, some strategic choices can be made, especially in terms of security. While you can simply deploy the default settings and have access to the web UI to configure it, you can also leverage configuration files and/or API to preconfigure or remotely configure the instance.
Here is a list of configuration methods that applies to the Edge:
XML Files: Core settings and protocol adapters are defined in config.xml (located in the conf directory). Various example configurations are provided for quick setup. Copying sample configurations into conf/config.xml is the recommended static configuration workflow.
REST API: Many runtime operations, including protocol adapter management, can be performed using REST API calls. Configuration options exposed via API are backed by the XML file but allow dynamic changes without a restart, depending on the deployment mode.
Web User Interface: The admin UI, available on port 8080 if enabled, interacts with the REST API for real-time configuration. This is especially useful for managing protocol adapter nodes and device tags using the workspace canvas.
An additional aspect needs to be considered: Mutable vs Immutable Mode. In standalone mode, configurations can be changed at runtime and written back to disk (“mutable”). In orchestrated/containerized deployments, configuration is typically considered “immutable” and restored to the initial state on restart, with runtime changes ephemeral unless exported.
In order to simplify the exercise of this lab, we create a config.xml file for your HiveMQ Edge instance. This file will contain all the configuration settings for the MQTT gateway, such as listeners, bridges, and security settings.
For this tutorial, we use a basic configuration. Create a file named config.xml with the following content:
<?xml version="1.0" encoding="UTF-8" standalone="yes"?>
<hivemq xsi:schemaLocation="config.xsd" xmlns:xsi="http://www.w3.org/2001/XMLSchema-instance">
   <config-version>1</config-version>
   <mqtt-listeners>
       <tcp-listener>
           <port>1883</port>
           <bind-address>0.0.0.0</bind-address>
       </tcp-listener>
   </mqtt-listeners>
   <mqtt-sn-listeners/>
   <restrictions>
       <max-connections>-1</max-connections>
       <max-client-id-length>65535</max-client-id-length>
       <max-topic-length>65535</max-topic-length>
       <no-connect-idle-timeout>10000</no-connect-idle-timeout>
       <incoming-bandwidth-throttling>0</incoming-bandwidth-throttling>
   </restrictions>
   <security>
       <payload-format-validation>
           <enabled>false</enabled>
       </payload-format-validation>
       <utf8-validation>
           <enabled>true</enabled>
       </utf8-validation>
       <allow-empty-client-id>
           <enabled>true</enabled>
       </allow-empty-client-id>
       <allow-request-problem-information>
           <enabled>true</enabled>
       </allow-request-problem-information>
   </security>
   <persistence>
       <mode>in-memory</mode>
   </persistence>
   <mqtt-bridges/>
   <admin-api>
       <enabled>true</enabled>
       <listeners/>
       <generated-tokens>
           <keySize>2048</keySize>
           <issuer>HiveMQ-Edge</issuer>
           <audience>HiveMQ-Edge-Api</audience>
           <expiryTimeMinutes>30</expiryTimeMinutes>
           <tokenEarlyEpochThresholdMinutes>2</tokenEarlyEpochThresholdMinutes>
       </generated-tokens>
       <users/>
       <pre-login-notice>
           <enabled>false</enabled>
       </pre-login-notice>
   </admin-api>
   <dynamic-configuration>
       <allow-configuration-export>false</allow-configuration-export>
       <allow-mutable-configuration>true</allow-mutable-configuration>
   </dynamic-configuration>
   <usage-tracking>
       <enabled>true</enabled>
   </usage-tracking>
   <data-combiners/>
   <modules/>
   <internal/>
</hivemq>
You can find more information about HiveMQ Edge configuration in the official documentation.
If you need to do advanced debugging and get more verbose logs during your tests, you can also create a file named logback.xml with the following content:
<!--
 ~ Copyright 2019-present HiveMQ GmbH
 ~
 ~ Licensed under the Apache License, Version 2.0 (the "License");
 ~ you may not use this file except in compliance with the License.
 ~ You may obtain a copy of the License at
 ~
 ~     http://www.apache.org/licenses/LICENSE-2.0
 ~
 ~ Unless required by applicable law or agreed to in writing, software
 ~ distributed under the License is distributed on an "AS IS" BASIS,
 ~ WITHOUT WARRANTIES OR CONDITIONS OF ANY KIND, either express or implied.
 ~ See the License for the specific language governing permissions and
 ~ limitations under the License.
 -->


<configuration scan="true" scanPeriod="60 seconds">


   <appender name="CONSOLE" class="ch.qos.logback.core.ConsoleAppender">
       <encoder>
           <pattern>%-30(%d %level)- %msg%n%ex</pattern>
       </encoder>
   </appender>


   <appender name="FILE" class="ch.qos.logback.core.rolling.RollingFileAppender">
       <file>${hivemq.log.folder}/hivemq.log</file>
       <append>true</append>


       <rollingPolicy class="ch.qos.logback.core.rolling.TimeBasedRollingPolicy">
           <!-- daily rollover -->
           <fileNamePattern>${hivemq.log.folder}/hivemq.%d{yyyy-MM-dd}.log</fileNamePattern>


           <!-- keep 30 days' worth of history -->
           <maxHistory>30</maxHistory>
       </rollingPolicy>
       <encoder>
           <pattern>%-30(%d %level)- %msg%n%ex</pattern>
       </encoder>
   </appender>


   <appender name="MIGRATIONS-FILE" class="ch.qos.logback.core.FileAppender">
       <file>${hivemq.log.folder}/migration.log</file>
       <append>true</append>
       <encoder>
           <pattern>%-30(%d %level)- %msg%n%ex</pattern>
       </encoder>
   </appender>


   <appender name="EVENT-FILE" class="ch.qos.logback.core.rolling.RollingFileAppender">
       <file>${hivemq.log.folder}/event.log</file>
       <append>true</append>
       <encoder>
           <pattern>%-24(%d)- %msg%n%ex</pattern>
       </encoder>
       <rollingPolicy class="ch.qos.logback.core.rolling.FixedWindowRollingPolicy">
           <fileNamePattern>${hivemq.log.folder}/event-%i.log.gz</fileNamePattern>
           <minIndex>1</minIndex>
           <maxIndex>5</maxIndex>
       </rollingPolicy>
       <triggeringPolicy class="ch.qos.logback.core.rolling.SizeBasedTriggeringPolicy">
           <maxFileSize>100MB</maxFileSize>
           <checkIncrement>10000</checkIncrement>
       </triggeringPolicy>
   </appender>


   <!-- appender for the script events of HiveMQ Data Hub -->
   <appender name="SCRIPT-FILE" class="ch.qos.logback.core.rolling.RollingFileAppender">
       <file>${hivemq.log.folder}/script.log</file>
       <append>true</append>
       <encoder>
           <pattern>%-24(%d)- %msg%n%ex</pattern>
       </encoder>
       <rollingPolicy class="ch.qos.logback.core.rolling.FixedWindowRollingPolicy">
           <fileNamePattern>${hivemq.log.folder}/script-%i.log.gz</fileNamePattern>
           <minIndex>1</minIndex>
           <maxIndex>5</maxIndex>
       </rollingPolicy>
       <triggeringPolicy class="ch.qos.logback.core.rolling.SizeBasedTriggeringPolicy">
           <maxFileSize>100MB</maxFileSize>
           <checkIncrement>10000</checkIncrement>
       </triggeringPolicy>
   </appender>


   <logger name="event.client-connected" level="DEBUG" additivity="false">
       <appender-ref ref="EVENT-FILE"/>
   </logger>


   <logger name="event.client-disconnected" level="DEBUG" additivity="false">
       <appender-ref ref="EVENT-FILE"/>
   </logger>


   <logger name="event.message-dropped" level="DEBUG" additivity="false">
       <appender-ref ref="EVENT-FILE"/>
   </logger>


   <logger name="event.client-session-expired" level="DEBUG" additivity="false">
       <appender-ref ref="EVENT-FILE"/>
   </logger>


   <logger name="migrations" level="DEBUG" additivity="false">
       <appender-ref ref="MIGRATIONS-FILE"/>
   </logger>


   <root level="${HIVEMQ_LOG_LEVEL:-DEBUG}">
       <appender-ref ref="FILE"/>
       <appender-ref ref="CONSOLE"/>
   </root>


   <!-- loggers for the script events of HiveMQ  Data Hub -->
   <logger name="script-event" level="${HIVEMQ_SCRIPT_LOG_LEVEL:-INFO}" additivity="false">
       <appender-ref ref="SCRIPT-FILE"/>
   </logger>
   <logger name="script-event-off" level="OFF" additivity="false">
       <appender-ref ref="SCRIPT-FILE"/>
   </logger>


   <logger name="jetbrains.exodus" level="WARN"/>
   <logger name="com.google.common.util.concurrent.Futures.CombinedFuture" level="OFF"/>
   <logger name="oshi" level="ERROR"/>
   <logger name="io.netty" level="WARN"/>
   <logger name="org.eclipse.milo" level="WARN"/>


</configuration>
This will add verbose debug logs in the log files as well as in the console of the Edge (container).
Step 2: Create a Custom HiveMQ Edge Docker Image
Since Barbara's primary mechanism for configuration is through environment variables, and there isn't a direct way to mount a configuration file, we will create a custom Docker compose that mounts our config.xml file (and our logback.xml).
Create a file named docker-compose.yaml with the following content:
version: "3.3"


services:
 hivemq-edge:
   image: hivemq/hivemq-edge:latest
   container_name: hivemq-edge
   restart: always
   volumes:
     - "./config.xml:/opt/hivemq/conf/config.xml"
     - "./logback.xml:/opt/hivemq/conf/logback.xml"
   networks:
     - barbaraServices
   ports:
     - 11883:1883
     - 8080:8080


networks:
 barbaraServices:
   driver: bridge
   name: barbaraServices
This docker-compose uses the official HiveMQ Edge image as a base and maps our custom config.xml and logback.xml files into the container's configuration directory.
Step 2.1 (Optional): Add the File RBAC Security Extension
For production environments, you'll want to secure your HiveMQ Edge instance. The HiveMQ File RBAC Security Extension is a great way to add username/password authentication and topic-level authorization. Let's include it in our custom image.
Download the Extension:
First, download the File RBAC Security Extension from the HiveMQ Marketplace. You will need to unzip the downloaded file to get the extension folder (e.g., hivemq-file-rbac-extension).
2. Create a Credentials File:
This extension uses an XML file to define roles and users. Create a file named credentials.xml with a sample user. For this example, we'll create a user named barbara with the password password.
<file-rbac>
        <users>
            <user>
                <name>barbara</name>
                <password>password</password>
            </user>
        </users>
        <roles/>
    </file-rbac>
3. Update the docker-compose:
Now, we need to update our docker-compose to copy the extension and the credentials file into the image.
Modify your docker-compose.yaml to look like this:
version: "3.3"


services:
 hivemq-edge:
   image: hivemq/hivemq-edge:latest
   container_name: hivemq-edge
   restart: always
   volumes:
     - "./config.xml:/opt/hivemq/conf/config.xml"
     - "./hivemq-file-rbac-extension/:/opt/hivemq/extensions/hivemq-file-rbac-extension/"
     - "./credentials.xml:/opt/hivemq/extensions/hivemq-file-rbac-extension/credentials.xml"
     - "./logback.xml:/opt/hivemq/conf/logback.xml"
   networks:
     - barbaraServices
   ports:
     - 11883:1883
     - 8080:8080


networks:
 barbaraServices:
   driver: bridge
   name: barbaraServices
Step 2.2: Zip Everything Together
To be able to deploy a custom application in Barbara’s portal, we need to pack our configuration files and our docker-compose in a Zip file that we will upload into Barbara platform in the next step.
Step 3: Deploy the Custom Application on Barbara Panel
Now that we have our custom docker-compose, we can deploy it on the Barbara platform.
1. Log in to your Barbara account on the Panel.
2. Navigate to the "Applications" section and click on "New Application".
3. Give your application a name, for example, "HiveMQ Edge Custom".

Step 4: Deploy the Application on Your Edge Node
Once the custom application has been successfully created, we can navigate to the Nodes manager, select the node we want the application to be deployed on, and add it.
 Click the node name to access details
 Navigate to the Apps and Models tab
Click on “Add your first app” (or “Add” if you already have existing applications), select the Custom HiveMQ Edge, and define the settings as needed.
 If needed, customize the App Config or leave it blank.
 If everything goes well, you will shortly have a running instance of HiveMQ Edge customized with your configuration on your node:

Step 5: Attach the HiveMQ Edge License
Add configuration based on the paragraph on the extension.
The final step is to attach your HiveMQ Edge license to the deployment. We will do this by adding an environment variable to the application configuration in the Barbara panel.
First, you need to base64 encode your license file. You can do this using the following command in your terminal:
cat /path/to/your/license.lic | base64This command will output a long string. Copy this string to your clipboard.
Now, go back to the Barbara panel:
1. Go to the "Applications" section and select your "HiveMQ Edge" application.
2. Go to the "Configuration" tab.
3. Click on "Add Environment Variable".
4. Set the "Name" of the variable to HIVEMQ_LICENSE.
5. Paste the base64 encoded license string into the "Value" field.
6. Save the configuration.
Barbara will now redeploy your application with the new environment variable, and your HiveMQ Edge instance will be running with the commercial license.
Conclusion
By combining Barbara and HiveMQ Edge, you can create a powerful and scalable solution for your IIoT needs. This integration allows you to centrally manage all your HiveMQ Edge deployments, easily push new configurations by updating the Docker image, and securely attach licenses without ever having to manually access the edge devices. This streamlined workflow simplifies the management of your edge infrastructure and allows you to focus on what really matters: your data and your applications.

Anthony Olazabal
Anthony is a Staff Solution Specialist at HiveMQ and part of the Solutions Engineering team at HiveMQ. He is a technology enthusiast with many years of experience working in infrastructures and development around Azure cloud architectures. His expertise extends to development, cloud technologies, and a keen interest in IaaS, PaaS, and SaaS services with a keen interest in writing about MQTT and IoT.


