HowTos
HowTo configure server-side TLS with HiveMQ and Keytool (self-signed)
The next sections show you step by step how to configure server side SSL/TLS with HiveMQ. In this scenario the client only validates the correct server certificate.
Generate a server side certificate for HiveMQ
-
Execute the following command
keytool -genkey -keyalg RSA -alias hivemq -keystore hivemq.jks -storepass changeme -validity 360 -keysize 2048
We highly recommend that you update the changemedefault to a strong password. -
Enter all prompted information for the certificate.
The first question asks about your first and last name. This is the common name of your certificate. Please enter the URL under which you will connect with your MQTT clients. For example, broker.yourdomain.com(for production) orlocalhost(for development). -
Confirm the correct entries with yes.
-
Determine the password for the newly generated key
-
It is highly recommended to use another password for the key than the key store itself
-
-
Place the hivemq.jks in the HiveMQ directory and add a TLS listener to config.xml
<listeners>
...
    <tls-tcp-listener>
        <port>8883</port>
        <bind-address>0.0.0.0</bind-address>
        <tls>
            <keystore>
                <path>hivemq.jks</path>
                <password>your-keystore-password</password>
                <private-key-password>your-key-password</private-key-password>
            </keystore>
            <client-authentication-mode>NONE</client-authentication-mode>
        </tls>
    </tls-tcp-listener>
...
</listeners>
The two passwords your-keystore-password and your-key-password are depending on which passwords you have entered in the previous steps.
Now we have successfully created a server-side key store and enabled HiveMQ to speak SSL/TLS.
Generate a PEM client certificate (e.g. mosquitto_pub/_sub)
When connecting with mosquitto_pub/_sub utils a PEM file of the certificate is required in order to allow the mosquitto clients to validate the self-signed certificate. You need to have access to the server key store generated in the above steps.
-
Export a PEM file from the server key store
keytool -exportcert -keystore hivemq.jks -alias hivemq -keypass your-key-password -storepass your-keystore-password -rfc -file hivemq-server-cert.pem
Please use your chosen key store password instead of your-keystore-password and your chosen key password instead of your-key-password. -
Use it with mosquitto_pub
mosquitto_pub -t "test/topic" -m "TLS works with client PEM" -p 8883 --cafile hivemq-server-cert.pem
Generate a client JKS trust store (e.g. Paho Java)
When connecting with any Java MQTT client a JKS client key store is required in order to validate the self-signed certificate. You need to have access to the server key store generated in the above steps.
-
Export the server certificate from the server key store
keytool -export -keystore hivemq.jks -alias hivemq -storepass your-keystore-password -file hivemq-server.crt
Please use your chosen key store password instead of your-keystore-password. -
Generate a client trust store
-
Execute the following command
keytool -import -file hivemq-server.crt -alias HiveMQ -keystore mqtt-client-trust-store.jks -storepass changeme
It is highly recommended to use a strong password instead of changeme!
-
Confirm the certificate with yes, before the trust store is successfully created.
-
-
Connect with Paho
This is only a simple example on how to test if TLS is working. For production usage a more sophisticated implementation is necessary. Connect to HiveMQ with SSL using Eclipse Pahoprivate static Logger log = LoggerFactory.getLogger(PublisherSSL.class); public static void main(String... args) { try { String clientId = "sslTestClient"; MqttClient client = new MqttClient("ssl://localhost:8883", clientId, new MemoryPersistence()); MqttConnectOptions mqttConnectOptions = new MqttConnectOptions(); try { mqttConnectOptions.setSocketFactory(getTruststoreFactory()); } catch (Exception e) { log.error("Error while setting up TLS", e); } client.connect(mqttConnectOptions); client.publish("test/topic", "TLS works with client JKS!".getBytes(), 0, false); client.disconnect(); } catch (MqttException e) { log.error("MQTT Exception:",e); } } public static SocketFactory getTruststoreFactory() throws Exception { KeyStore trustStore = KeyStore.getInstance("JKS"); InputStream in = new FileInputStream("mqtt-client-trust-store.jks"); trustStore.load(in, "your-client-keystore-password".toCharArray()); TrustManagerFactory tmf = TrustManagerFactory.getInstance(TrustManagerFactory.getDefaultAlgorithm()); tmf.init(trustStore); SSLContext sslCtx = SSLContext.getInstance("TLSv1.2"); sslCtx.init(null, tmf.getTrustManagers(), null); return sslCtx.getSocketFactory(); }Don’t forget to replace the passwords in the snippet with your chosen passwords!
HowTo configure TLS with HiveMQ and Portecle (self-signed)
-
Download the newest version of Portecle from here and unzip it
-
Start Portecle with a double-click on the jar or java -jar portecle.jar in the console
Portecle after start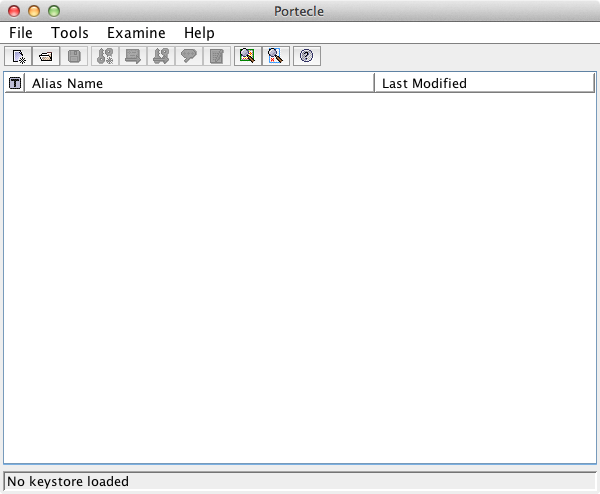
-
Firstly create the server key store
-
Choose File → New Keystore from the menu and select JKS as key store type in the popup window
Choose Java key store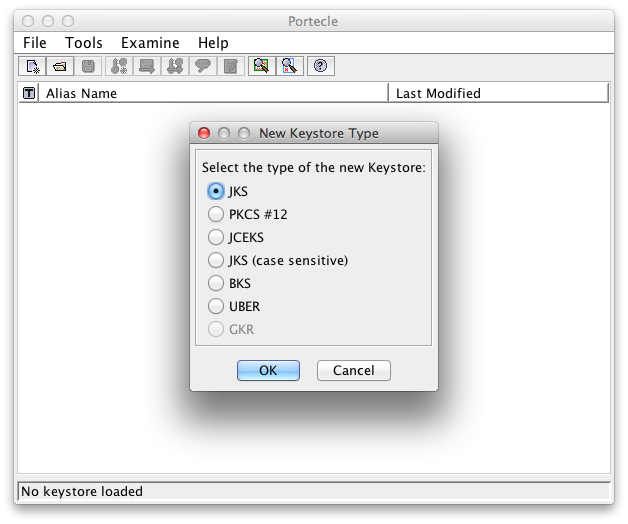
-
Create a new Key Pair: Tools → Generate Key Pair
-
Choose a Key Algorithm and Key Size
Common Key Algorithm and Size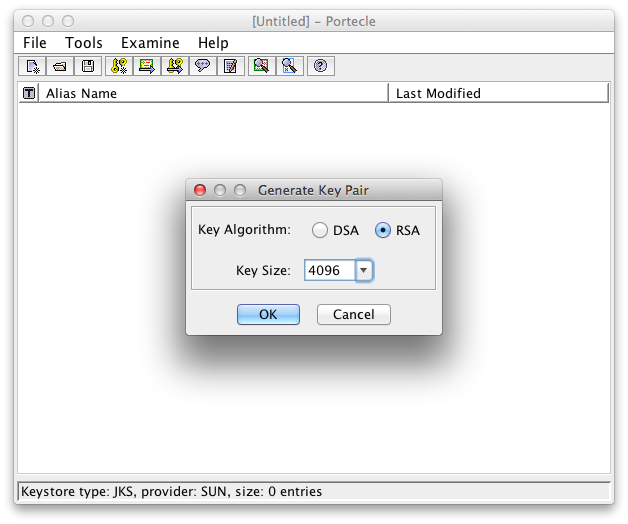
-
Enter the Signature Algorithm (recommended is SHA512withRSA) and the Certificate Details
Certificate Signature Algorithm and Details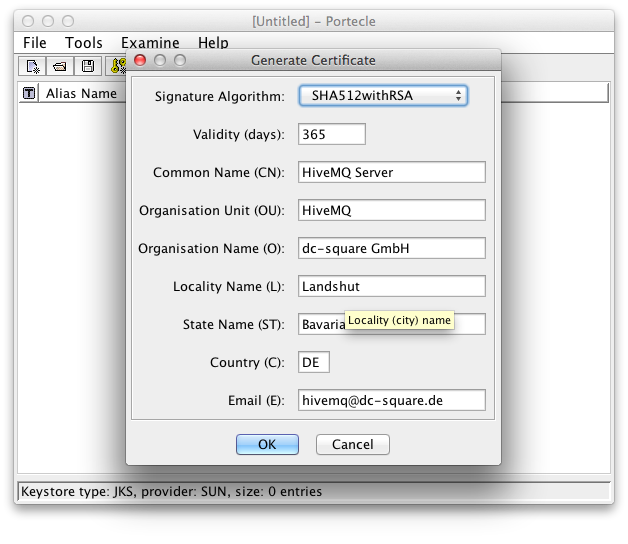
-
Choose a Key Pair Entry Alias.
An alias for the key pair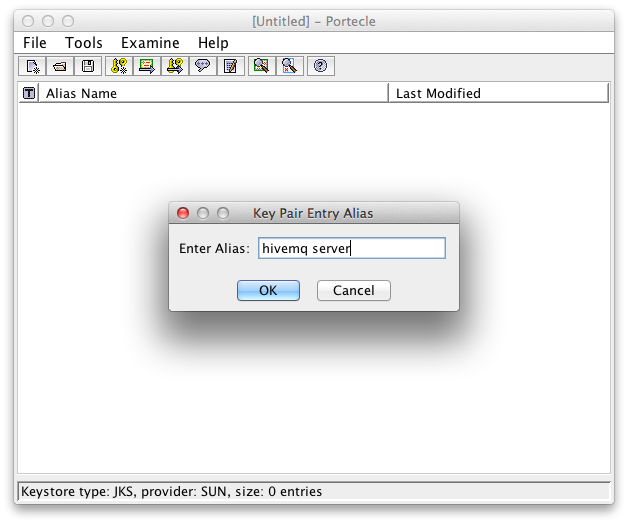
-
Set a password for the Key Pair Entry
A password to protect the private key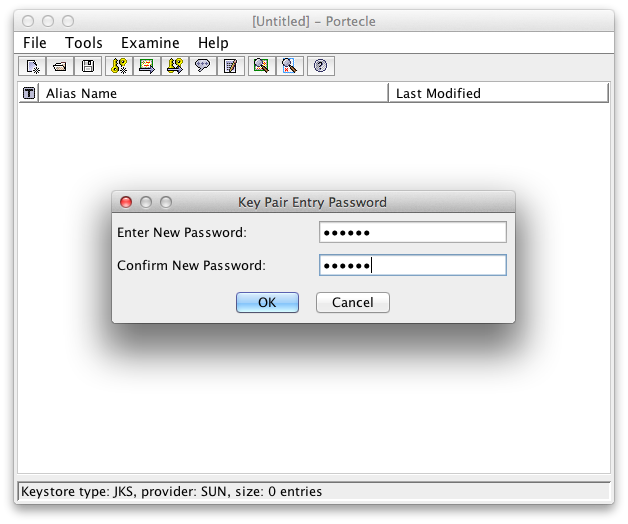 Successful Generation of Key Pair
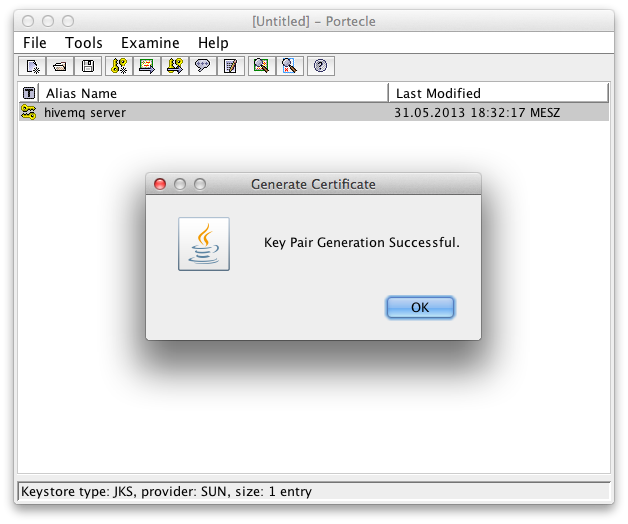
-
Save the key store: File → Save Keystore As…
Save the key store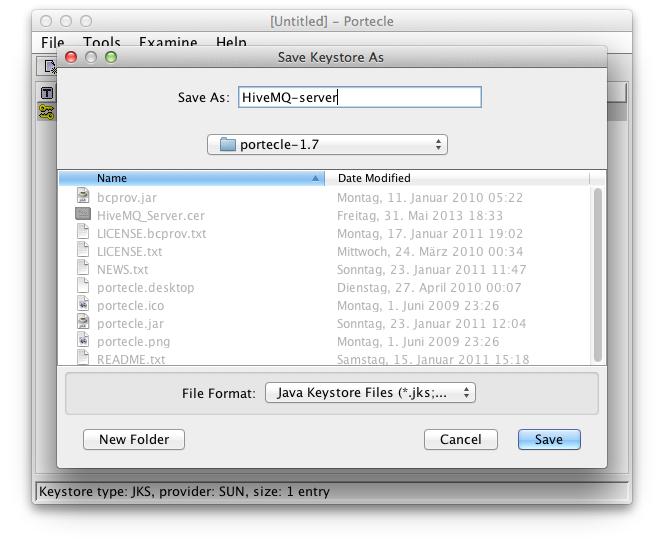
-
Export the certificate for the client: Right Click on the certificate key pair and click Export
-
Select Head Certificate as Export Type and choose an export format (recommended is PEM)
Export Details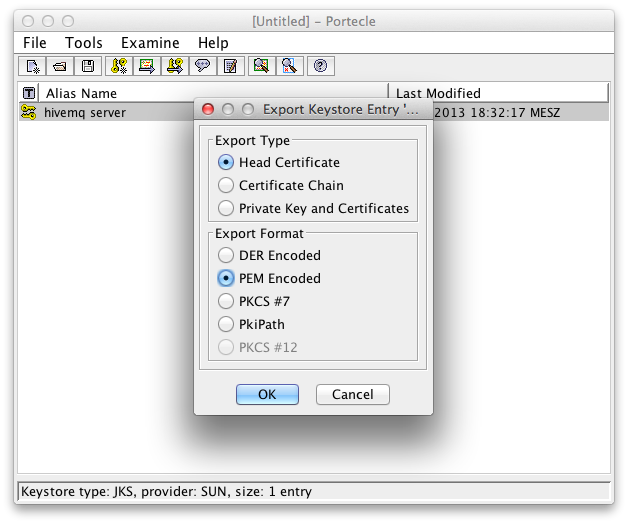
-
Choose directory to save the certificate
Export Successful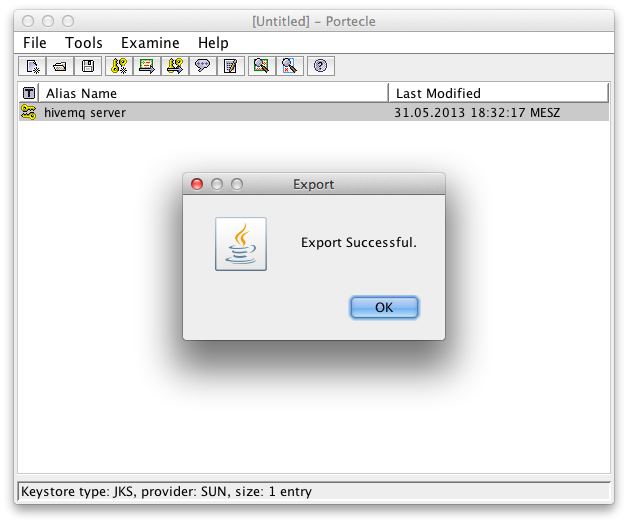
-
-
Secondly create the client key store
-
Choose File → New Keystore from the menu and also select JKS as key store Type
-
Import the just saved certificate via Tools → Import Trusted Certificate
-
Select the previous exported certificate
Import server head certificate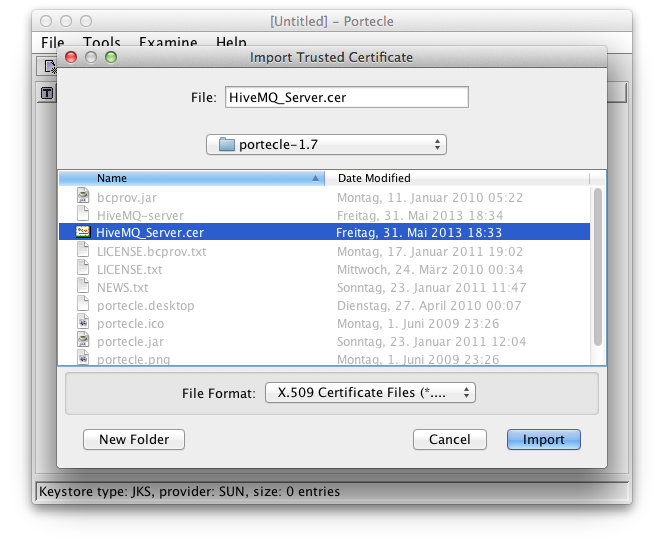
-
Confirm the message that the trust path could not be established. This is because the certificate is self-signed and no certificate chain can verify it.
Warning because of the self-signed certificate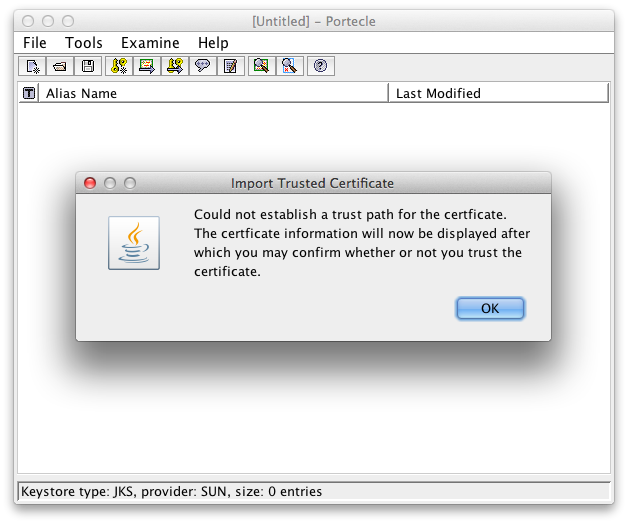
-
Confirm the showed certificate details
Certificate Details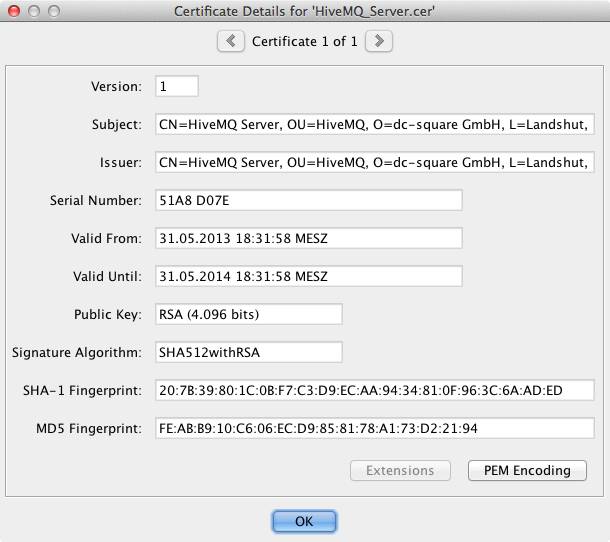
-
Trust the certificate with clicking Yes.
Accept to trust our created self-signed certificate for the server -
Enter an alias
Alias for the server certificate in the client key store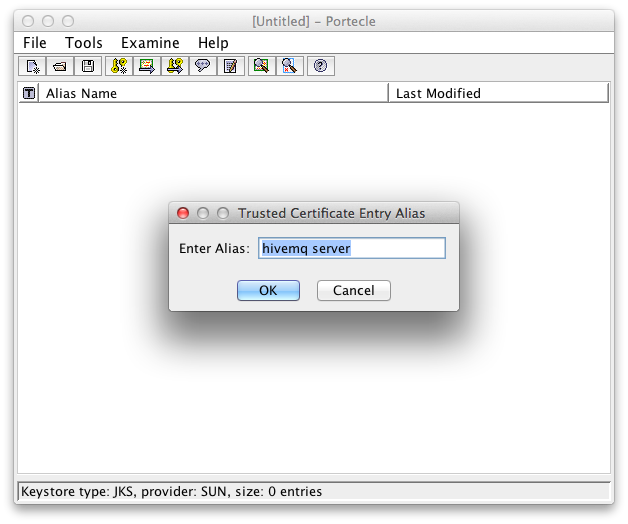 Successful import of the server certificate in the client key store
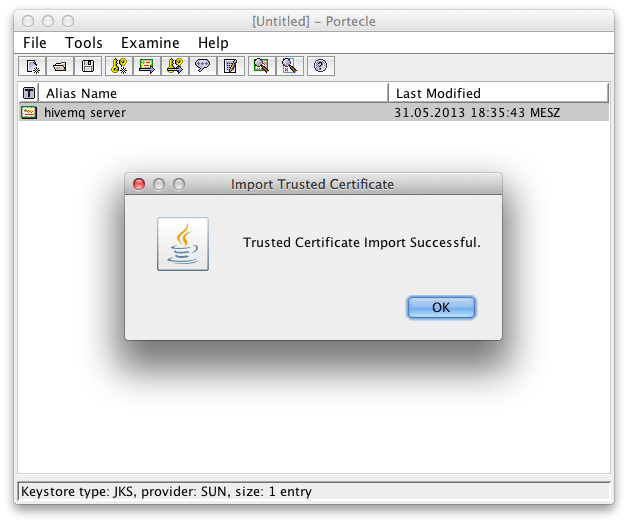
-
Save the key store as client.jks with File → Save Keystore As…
-
-
Place the server.jks in the HiveMQ directory and add a TLS listener to config.xml
<listeners> ... <tls-tcp-listener> <port>8883</port> <bind-address>0.0.0.0</bind-address> <tls> <keystore> <path>server.jks</path> <password>your-keystore-password</password> <private-key-password>your-key-password</private-key-password> </keystore> <client-authentication-mode>NONE</client-authentication-mode> </tls> </tls-tcp-listener> ... </listeners> -
Use client.jks to connect with a client
Using PEM files (for mosquitto_pub/_sub and other clients)
-
Follow the following sections from Appendix A: Generate a server side certificate for HiveMQ and Generate a PEM client certificate
-
Make sure the server side TLS works with mosquitto_pub/_sub and HiveMQ
-
Generate client certificates
This step needs to be done for each client that connects to HiveMQ. Also this is not the only way on how to create certificates. There are different options depending on your use case and capabilities. -
Generate client certificate for PEM-based clients like mosquitto_sub/_pub
-
Execute the following command for each client
openssl req -x509 -newkey rsa:2048 -keyout mqtt-client-key-2.pem -out mqtt-client-cert-2.pem -days 360
-
Enter all prompted information for the certificate. You end of with two PEM files: mqtt-client-key-2.pem and mqtt-client-cert-2.pem
-
-
-
Create a trust store for HiveMQ
When the client connects with a certificate HiveMQ needs a trust store in order to validate the self-signed certificates. You need to have access to all certificate PEM files generated in the previous step.
-
Export the client certificate from the PEM certification file
openssl x509 -outform der -in mqtt-client-cert-2.pem -out mqtt-client-cert-2.crt
-
Generate one common server trust store
-
Execute the following command for each client certificate
keytool -import -file mqtt-client-cert-2.crt -alias client2 -keystore hivemq-trust-store.jks -storepass changeme
It is highly recommended to use a strong password instead of changeme!
-
Confirm the certificate with yes, before the trust store is successfully created.
-
-
-
Change the config.xml in the HiveMQ directory
<listeners> ... <tls-tcp-listener> ... <tls> <keystore> ... </keystore> <client-authentication-mode>REQUIRED</client-authentication-mode> <truststore> <path>hivemq-trust-store.jks</path> <password>your-hivemq-trust-store-password</password> </truststore> </tls> </tls-tcp-listener> ... </listeners>-
Connect with mosquitto_pub/_sub to HiveMQ
In the code sample we use the client trust store (hivemq-server-cert.pem) from Appendix A and the just generated PEM files to setup a full TLS client authentication to HiveMQ
mosquitto_pub -t "test" -m "test" -p 8883 --cert mqtt-client-cert-2.pem --key mqtt-client-key-2.pem --cafile hivemq-server-cert.pem
-
Using Java Key stores (Eclipse Paho Java clients)
-
Follow the following sections from Appendix A: Generate a server side certificate for HiveMQ and Generate a client JKS trust store
-
Make sure the server side TLS works with Eclipse Paho and HiveMQ
-
Generate client certificates
This step needs to be done for each client that connects to HiveMQ. Also this is not the only way on how to create certificates. There are different options depending on your use case and capabilities. -
Generate client certificate for each Eclipse Paho Java client
-
Execute the following command for each client
keytool -genkey -keyalg RSA -alias mqtt-paho-client-1 -keystore mqtt-paho-client-1.jks -storepass changeme -validity 360 -keysize 4096
It is highly recommended to use a strong password instead of changeme!
-
Enter all prompted information for the certificate.
-
-
-
Generate one common server trust store for HiveMQ
When the client connects with a certificate HiveMQ needs a trust store in order to validate the self-signed certificates. You need to have access to all client key store generated in the previous step.
-
Export the client certificate from each of the client key stores
keytool -export -keystore mqtt-paho-client-1.jks -alias mqtt-paho-client-1 -storepass your-client-keystore-password -file mqtt-paho-client-1.crt
Please use your chosen key store password instead of your-client-keystore-password. -
Generate a server trust store
-
Execute the following command for each client certificate
keytool -import -file mqtt-paho-client-1.crt -alias client1 -keystore hivemq-trust-store.jks -storepass changeme
It is highly recommended to use a strong password instead of changeme!
-
Confirm the certificate with yes, before the trust store is successfully created.
-
-
-
Change the config.xml in the HiveMQ directory
<listeners> ... <tls-tcp-listener> ... <tls> <keystore> ... </keystore> <client-authentication-mode>REQUIRED</client-authentication-mode> <truststore> <path>hivemq-trust-store.jks</path> <password>your-hivemq-trust-store-password</password> </truststore> </tls> </tls-tcp-listener> ... </listeners>-
Connect with Paho In the code sample we use the client trust store from Appendix A and the just generated client key store to setup a full TLS client authentication with Eclipse Paho for Java
This is only a simple example on how to test if TLS is working. For production usage a more sophisticated implementation is necessary. Connect to HiveMQ with SSL using Eclipse Pahoprivate static Logger log = LoggerFactory.getLogger(PublisherClientCertSSL.class); public static void main(String... args) { try { String clientId = "sslTestWithCert"; MqttClient client = new MqttClient("ssl://localhost:8883", clientId, new MemoryPersistence()); MqttConnectOptions mqttConnectOptions = new MqttConnectOptions(); try { mqttConnectOptions.setSocketFactory(getTruststoreFactory()); } catch (Exception e) { log.error("Error while setting up TLS", e); } client.connect(mqttConnectOptions); client.publish("test", "test".getBytes(), 1, true); client.disconnect(); } catch (MqttException e) { log.error("MQTT Exception:",e); } } public static SocketFactory getTruststoreFactory() throws Exception { //Create key store KeyStore keyStore = KeyStore.getInstance("JKS"); InputStream inKey = new FileInputStream("mqtt-paho-client-1.jks"); keyStore.load(inKey, "your-client-key-store-password".toCharArray()); KeyManagerFactory kmf = KeyManagerFactory .getInstance(KeyManagerFactory.getDefaultAlgorithm()); kmf.init(keyStore,"your-client-key-password".toCharArray()); //Create trust store KeyStore trustStore = KeyStore.getInstance("JKS"); InputStream in = new FileInputStream("mqtt-client-trust-store.jks"); trustStore.load(in, "your-client-trust-store-password".toCharArray()); TrustManagerFactory tmf = TrustManagerFactory .getInstance(TrustManagerFactory.getDefaultAlgorithm()); tmf.init(trustStore); // Build SSL context SSLContext sslCtx = SSLContext.getInstance("TLSv1.2"); sslCtx.init(kmf.getKeyManagers(), tmf.getTrustManagers() , null); return sslCtx.getSocketFactory(); }Don’t forget to replace the passwords in the snippet with your chosen passwords!
-