General Concepts
A HiveMQ plugin is essentially a Java JAR file which is dropped in into the plugins folder of the HiveMQ installation. HiveMQ utilizes the standard Java Service Loader mechanism [1].
| Only HiveMQ plugins that are written in Java are officially supported. Java compatible languages like Scala are not supported. |
Using Dependency Injection
The recommended way of developing plugins is by using Dependency Injection. HiveMQ utilizes Google Guice as dependency injection provider. Typically most plugins will use the JSR 330 API like the javax.inject.Inject annotation.
HiveMQ plugins (and all dependent classes) can be written with constructor injection, field injection and method injection. Constructor injection tends to be the most convenient way as it allows maximum testability.
It is also possible to use annotations from JSR 250 aka Lifecycle Management Annotations in your plugin. You can annotate a method in your class with @javax.annotation.PostConstruct and @javax.annotation.PreDestroy to hook into the lifecycle.
| Name | Target | Description |
|---|---|---|
|
Constructor, Field, Method (Setter) |
Injects the object(s) specified. |
|
Class, Method (Provider) |
Defines that an object is a Singleton. |
|
Method |
Executes this method after all injection took place. |
|
Method |
Executes shutdown logic when HiveMQs LifecycleManager shuts down. This is only the case when HiveMQ itself shuts down. |
|
Method |
Used for Provider Methods defined in the HiveMQPluginModule. |
The following shows an example of a constructor injection in the PluginEntryPoint of the HiveMQ plugin. It also shows the use of a javax.annotation.PostConstruct annotation to execute a method after the injection (and the constructor call) is finished.
import com.hivemq.spi.PluginEntryPoint;
import javax.annotation.PostConstruct;
import javax.inject.Inject;

public class TestPlugin extends PluginEntryPoint {

    private final MyDependency myDependency;

    @Inject (1)
    public TestPlugin(MyDependency myDependency) {
        this.myDependency = myDependency;
    }

    @PostConstruct (2)
    public void postConstruct() {

        myDependency.doSomething();
    }
}| 1 | Constructor Injection |
| 2 | JSR 250 Lifecycle method which runs after injections took place |
|
Don’t like dependency injection?
Although not recommended, it is possible to write HiveMQ plugins the old fashioned Java way without dependency injection.
Please make sure that you have a no-argument constructor in your PluginEntryPoint subclass.
Note that you won’t be able to use the Services APIs without dependency injection.
|
Plugin Project Structure
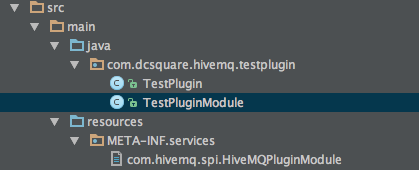
For the most minimal HiveMQ plugin you need at least two different classes and a text file for the service loader mechanism:
-
A class which extends
com.hivemq.spi.HiveMQPluginModule -
A class which extends
com.hivemq.spi.PluginEntryPoint -
A text file which resides in META-INF/services and is named com.hivemq.spi.HiveMQPluginModule
|
Using the Maven Archetype
There is a Maven Archetype available which generates all classes and files needed for a plugin.
|
Your class which extends com.hivemq.spi.HiveMQPluginModule is responsible for bootstrapping your module.
That means, it is responsible for the following things:
-
Define bindings for your dependency injection.
-
Declaring a class which is your Plugin Entry Point. This class acts as your plugin business logic "main method".
|
Using Guice Provider methods
You can use standard Guice provider methods in your implementation of com.hivemq.spi.HiveMQPluginModule.
|
The following shows the most simple implementation of com.hivemq.spi.HiveMQPluginModule.
com.hivemq.spi.HiveMQPluginModule implementationimport com.hivemq.spi.HiveMQPluginModule;
import com.hivemq.spi.PluginEntryPoint;
public class TestPluginModule extends HiveMQPluginModule {
@Override
protected void configurePlugin() {
(1)
}
@Override
protected Class<? extends PluginEntryPoint> entryPointClass() {
return TestPlugin.class; (2)
}
}| 1 | You can wire your dependencies here with standard Guice bindings. |
| 2 | This is your plugins main entry class. |
PluginEntryPoint
Your class which implements com.hivemq.spi.PluginEntryPoint can be seen as the "main method" of your plugin.
The constructor and the @PostConstruct annotated method are called when the HiveMQ server starts up.
You can use Dependency Injection and inject all the dependencies you wired up in your HiveMQPluginModule subclass.
It’s even possible to inject some HiveMQ specific objects like the CallbackRegistry.
import com.hivemq.spi.PluginEntryPoint;

import javax.annotation.PostConstruct;
import javax.inject.Inject;

public class TestPlugin extends PluginEntryPoint {

    private final MyDependency dependency;

    @Inject
    public TestPlugin(MyDependency dependency) { (1)
        this.dependency = dependency;
    }

    @PostConstruct
    public void postConstruct() { (2)
        dependency.doSomething();
    }
}| 1 | You can inject any dependency with constructor injection. |
| 2 | This method gets executed after the injections are done and the constructor was executed. |
META-INF file
To enable HiveMQ to detect your plugin as a plugin, a text file called com.hivemq.spi.HiveMQPluginModule has to be
created in META-INF/services. The contents of the file is one line which contains the fully qualified class
name of your HiveMQPluginModule subclass.
com.hivemq.testplugin.TestPluginModule
Callback Registry
Typically most HiveMQ plugins implemented at least one Callback. See the Callbacks Chapter for more information on the concrete callbacks.
Registering your own callbacks is pretty easy from your PluginEntryPoint implementation.
You can call getCallbackRegistry() to get the callback registry.
import com.hivemq.spi.PluginEntryPoint;

public class TestPlugin extends PluginEntryPoint {

    public TestPlugin() {

        getCallbackRegistry().addCallback(new MyPublishReceivedCallback());
    }
}|
Getting a reference to the callback registry in other classes
When you want to use the callback registry in other classes than your PluginEntryPoint class, you can just
inject it. If you don’t like to use dependency injection, you have to pass the CallbackRegistry manually.
|
| Callbacks are only registered on the HiveMQ nodes, which contain the plugin. Keep in mind that a Callback for a client will always be called on the node, the client is connected to. If you want to catch all callbacks in a HiveMQ cluster, you need to deploy your plugin to all HiveMQ nodes. |
Plugin Information
It is strongly recommended to annotate your HiveMQPluginModule with com.hivemq.spi.plugin.meta.Information for
additional metadata about the plugin. HiveMQ uses these metadata for monitoring and information purposes.
When starting HiveMQ with your plugin, HiveMQ will log your defined plugin name and version on startup.
If you forget to add the @Information annotation to your HiveMQPluginModule implementation, HiveMQ will log a warning on startup.
|
import com.hivemq.spi.HiveMQPluginModule;
import com.hivemq.spi.plugin.meta.Information;

@Information(
        name = "My test plugin",
        author = "John Doe",
        version = "1.0",
        description = "A test plugin to show the HiveMQ plugin capabilities")
public class TestPluginModule extends HiveMQPluginModule {
    ...
}
Logging
For logging purposes, HiveMQ plugins are encouraged to utilize the excellent SLF4J API. When using SLF4J, plugins don’t have to wrestle with logging configuration as the HiveMQ server takes care of it. No surprises here, just use the standard SLF4J API.
import com.hivemq.spi.PluginEntryPoint;
import org.slf4j.Logger;
import org.slf4j.LoggerFactory;

public class TestPlugin extends PluginEntryPoint {

    private static final Logger log = LoggerFactory.getLogger(TestPlugin.class); (1)

    public TestPlugin() {

        log.info("Hello, I'm logging here");
    }
}| 1 | Standard SLF4J Logger creation |
|
LogService
You can change the logging level of HiveMQ programmatically with the Log Service.
|
Don’t block!
The single most important rule for all plugins is: Don’t block in callbacks. Never.
You can, use the com.hivemq.spi.services.PluginExecutorService for everything which potentially blocks in callbacks.
By the way: It’s also a great idea to use Connection Pools (e.g. HikariCP) if you are dealing with databases.
The following shows an example code which uses the PluginExecutorService for non blocking behaviour.
import com.hivemq.spi.PluginEntryPoint;
import com.hivemq.spi.callback.events.broker.OnBrokerStart;
import com.hivemq.spi.callback.exception.BrokerUnableToStartException;
import org.slf4j.Logger;
import org.slf4j.LoggerFactory;

import javax.annotation.PostConstruct;
import javax.inject.Inject;
import com.hivemq.spi.services.PluginExecutorService;
import com.hivemq.spi.callback.CallbackPriority;

public class TestPlugin extends PluginEntryPoint {

    private static final Logger log = LoggerFactory.getLogger(TestPlugin.class);

    private final ExecutorService executorService;

    @Inject
    public TestPlugin(final PluginExecutorService executorService) { (1)
        this.executorService = executorService;
    }

    @PostConstruct
    public void postConstruct() { (2)
        getCallbackRegistry().addCallback(new OnBrokerStart() { (3)
            @Override
            public void onBrokerStart() throws BrokerUnableToStartException {
                executorService.submit(new Runnable() { (4)
                    @Override
                    public void run() {
                        log.info("Starting long operation");
                        try {
                            Thread.sleep(5000); (5)
                        } catch (InterruptedException e) {
                            log.error("Error", e);
                        }
                        log.info("Stopping long operation");

                    }
                });
            }

            @Override
            public int priority() {
                return CallbackPriority.HIGH; (6)
            }
        });
    }
}| 1 | Injecting the PluginExecutorService |
| 2 | After the injections are done this method gets executed |
| 3 | We add an anonymous inner class which implements the OnBrokerStart Callback |
| 4 | We submit a Runnable — which gets executed asynchronously — to the ExecutorService |
| 5 | This is our long running method. We simulate it with a simple Thread.sleep. |
| 6 | This defines that our Callback has High Priority compared to other OnBrokerStart callbacks for HiveMQ. |
Caching
The single most important rule in HiveMQ plugins is: Don’t block.
Under some circumstances you have to block, for example when you are waiting of responses from your database,
a REST API call or when reading something from the filesystem.
If you are doing this in a callback which is called very often (like the OnPublishReceivedCallback),
you most likely want to implement caching.
In general, all plugins are responsible for proper caching by themselves.
HiveMQ offers the convenient annotation com.hivemq.spi.aop.cache.Cached which caches the return values of methods.
This annotation also respects the parameters you pass to the method and will only cache return values for method executions
with the same parameters. You can define a duration how long the method return values are cached. Note that the Cache is unbounded.
If you need to cache huge amounts of data, consider using manual caching via Google Guava or similar libraries.
Here is an example how the method caching works in a plugin:
import com.hivemq.spi.PluginEntryPoint;
import com.hivemq.spi.aop.cache.Cached;
import org.slf4j.Logger;
import org.slf4j.LoggerFactory;

import javax.annotation.PostConstruct;
import javax.inject.Inject;
import java.util.Date;
import com.hivemq.spi.services.PluginExecutorService;
import java.util.concurrent.TimeUnit;

public class TestPlugin extends PluginEntryPoint {

    private static final Logger log = LoggerFactory.getLogger(TestPlugin.class);
    private final PluginExecutorService pluginExecutorService;

    @Inject
    public TestPlugin(PluginExecutorService pluginExecutorService) {
        this.pluginExecutorService = pluginExecutorService;
    }

    @PostConstruct
    public void postConstruct() {
        pluginExecutorService.scheduleAtFixedRate(new Runnable() { (1)
            @Override
            public void run() {
                log.info(getDate().toString()); (2)
            }
        }, 1, 1, TimeUnit.SECONDS); (3)
    }


    @Cached(timeToLive = 10, timeUnit = TimeUnit.SECONDS) (4)
    public Date getDate() {
        return new Date();
    }
}| 1 | We are scheduling a new Runnable Task which gets executed at a fixed rate |
| 2 | We just output the the value from the getDate() method to verify this was actually cached |
| 3 | We are scheduling this task every second |
| 4 | Here we define that the result of the method has to be cached for 10 seconds. |
The caching with the com.hivemq.spi.aop.cache.Cached annotation only works on objects created by the
Dependency Injection Container. That means if you instantiate a class with that annotation by yourself, the caching won’t work.
|
For more fine grained caching, we recommend to implement caching on your own and use a full fledged caching library. For simple caching, you can utilize Google Guava (included as dependency in the SPI).
ClientData
Most callbacks pass a com.hivemq.spi.security.ClientData object to the callback method.
This ClientData object encapsulates information about the MQTT client that is involved when this callback is called.
A ClientData object contains the following information about the client:
-
The MQTT client identifier
-
The username of the MQTT client
-
The SSL certificate if a X.509 client certificate was used by the client
-
Authentication status of the client
-
The IP address of the client
-
The listener information of the client
-
PROXY protocol information if the client connected via a proxy
Some callbacks pass a com.hivemq.spi.security.ClientCredentialsData, which is a subclass of ClientData object, to
the callback methods. ClientCredentialsData include additional credentials details like passwords.
Having the ClientData present in callbacks allows your plugin to behave differently for different client contexts.
Listener information
HiveMQ has the ability to start with multiple listeners or add listeners at runtime. The ClientData object that is passed to most callback methods also contains the listener the MQTT client connected to. This may be useful if you need to determine if a client connected via WebSockets, TLS or plain TCP.
The following code snippet shows how to distinguish between listeners and how to get details from the listeners:
final OnPingCallback onPingCallback = new OnPingCallback() {

 @Override
 public void onPingReceived(ClientData clientData) {

     final Listener listener = clientData.getListener().get(); (1)

     System.out.println("Listener name" + listener.readableName()); (2)
     System.out.println("Bind Address" + listener.getBindAddress());
     System.out.println("Port: " + listener.getPort());
     System.out.println("Proxy Protocol: " + listener.isProxyProtocolSupported());

     if (listener instanceof TlsTcpListener) { (3)
         System.out.println("TLS keystore path " +
                 ((TlsTcpListener) listener).getTls().getKeystorePath());
     } else if (listener instanceof WebsocketListener) {
         System.out.println("Websocket Path: " + ((WebsocketListener) listener).getPath());
     }
};| 1 | The listener is optional since there are rare circumstances where the listener data is not available |
| 2 | The listeners have some properties in common |
| 3 | If you need specific details (e.g. TLS information), down-casting to the concrete class is needed |
|
Utility for listeners
There is a utility class com.hivemq.spi.util.Listeners available that helps to avoid boilerplate code and has
useful methods when working with listeners.
|
PROXY Protocol information
HiveMQ supports the PROXY protocol, which allows to get data about the original MQTT client even if a load balancer or proxy is deployed and the MQTT clients don’t connect directly to HiveMQ but the proxy (which then establishes a connection with HiveMQ).
HiveMQ supports PROXY protocol version 1 and 2 transparently. All data that can be gathered via the PROXY protocol is available for plugin callbacks. In order to utilize the PROXY protocol, the listener the client connected to must be configured to allow the PROXY protocol.
Custom TLVs as specified in the PROXY protocol 2 spec are supported. It’s even possible for your load balancer or proxy to use non-specified TLVs and HiveMQ is able to use these in the plugins.
The following example shows how PROXY information can be used in your plugins.
Optional<ProxyInformation> proxy = clientData.getProxyInformation();
if (proxy.isPresent()) {
    ProxyInformation proxyInformation = proxy.get();
    System.out.println("Original client IP: " + proxyInformation.sourceAddress().getHostAddress());
    System.out.println("Original client port: " + proxyInformation.sourcePort());
    System.out.println("Proxy IP: " + proxyInformation.proxyAddress().getHostAddress());
    System.out.println("Proxy port: " + proxyInformation.proxyPort());
    System.out.println("TLS version used: " + proxyInformation.tlsVersion().or("none"));
    System.out.println("X.509 client certificate CN: " + proxyInformation.sslCertificateCN().or("none"));
}|
Proxy Protocol TLVs
HiveMQ supports custom TLVs that are not specified by the official Proxy Protocol specification. If you have a load
balancer that forwards custom data in the PROXY protocol TLV format, you are able to use this information in the plugin
system via the rawTLVs() method of the ProxyInformation object.
|
Measuring execution times
HiveMQ offers several convenient annotations to monitor your plugins. The data gathered for the annotated methods is stored in the HiveMQ MetricRegistry.
| Name | Description |
|---|---|
Counted |
Methods annotated with this annotation are added to the HiveMQ MetricRegistry automatically as Counters. The invocation of the annotated methods are counted. |
ExceptionMetered |
Methods annotated with this annotation are added to the HiveMQ MetricRegistry automatically as Meters. The exceptions thrown by the annotated method are counted. |
Metered |
Methods annotated with this annotation are added to the HiveMQ MetricRegistry automatically as Meters. The methods annotated with this Annotation get instrumented as Meters. |
Timed |
Methods annotated with this annotation are added to the HiveMQ MetricRegistry automatically as Timers. The invocation times of the methods annotated with this Annotation are captured automatically. |
@Timed(name = "get.date.duration")
public Date getDate() {
    return new Date();
}| These annotations only work on objects created by the Dependency Injection Container. That means if you instantiate a class with these annotations by yourself, the measurements won’t work. |
Plugin Isolation
Since HiveMQ version 2.1.0, HiveMQ uses plugin isolation. That means, each plugin has its own classloader and resources and classes cannot be shared between plugins. This adds additional security for your plugin and avoids nasty bugs if you include the same libraries in different plugins.
Some libraries like Jersey are nasty and want to interfere with other class loaders, so this can lead to side effects. HiveMQ implements workarounds for such libraries internally. If you are using such a library which isn’t covered yet by HiveMQ, please contact support@hivemq.com so we can include workarounds for such libraries.
Miscellaneous
|
Don’t use experimental APIs
Some APIs are marked with the annotation @Experimental.
These APIs are subject to change and you should prepare for updating your plugin with a new HiveMQ release.
Typically these APIs aren’t documented in this plugin guide but can be found in the source code.
|